
As I recently wrote on my last post, I’ve moved this site to use AWS from github pages.. Here’s how to do it.
What you’ll need:
- A domain name
- An AWS account
- Static website resources (html, css, etc…)
Setting up S3 to store your files
First, create a bucket to store your files. To do this, head over to the S3 section of your AWS console: aws console. I chose my bucket name to be richinfante-com, but you can name it just about anything. For now, you can leave all the other options unchanged.
Next, upload your site resources to the bucket. AWS has a web upload tool, but there’s plenty of tools such as the aws cli tool, and others to upload directly from your computer. I’ve been using s3_website
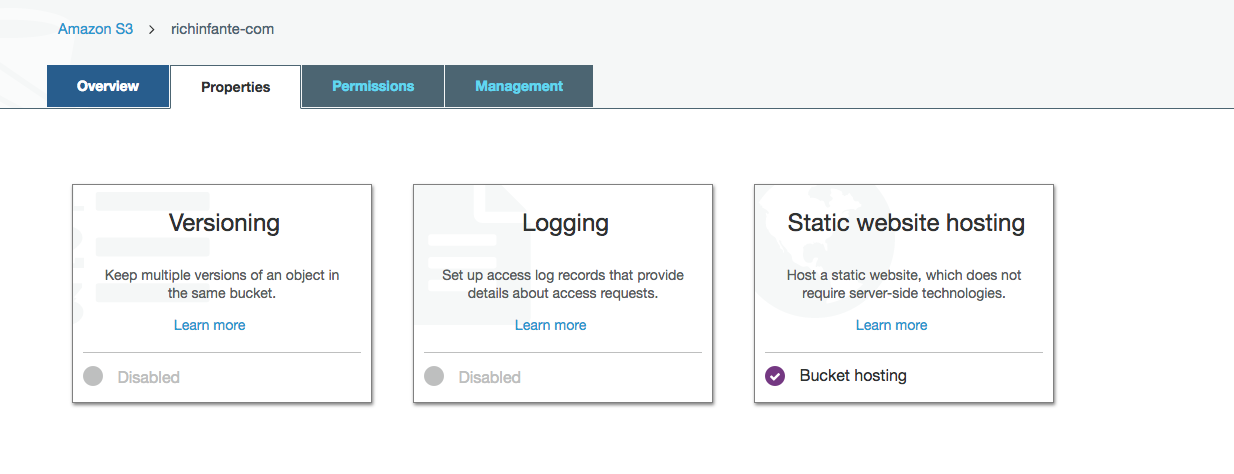
Next, we’ll enable static hosting. If you visit the Properties tab of your bucket, you should see a “Static Website Hosting” tile.
Clicking it will reveal the following panel. You should most likely be setting the index document to index.html and if you have an error page you can set that option here.
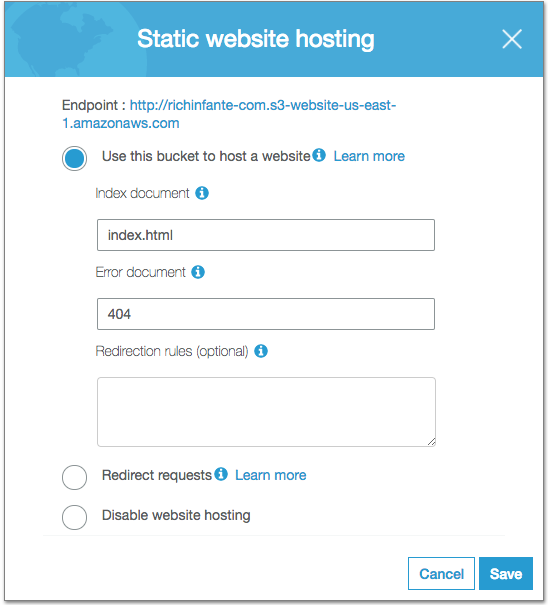
You should then be able to visit the website by clicking the link on the panel.
Setting up Cloudfront
Cloudfront is where the magic happens, We’re going to create a distribution and attach it to our domain name. We’ll provision SSL certificates using cloudfront as well.
To get started, visit the console cloudfront console. Next, we’re going to select create distribution, and then web distribution.
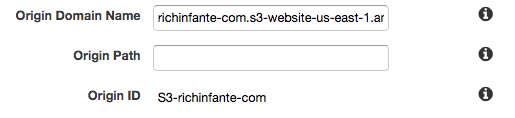
The first option we’ll set is the “Origin Domain Name”. Here, We want to enter the domain name of the static site. It’ll look something like this: richinfante-com.s3-website-us-east-1.amazonaws.com. Next, set the “Origin ID” to something unique. I used the name of my S3 bucket for mine. What you set for the ID doesn’t matter, as long as it’s unique.
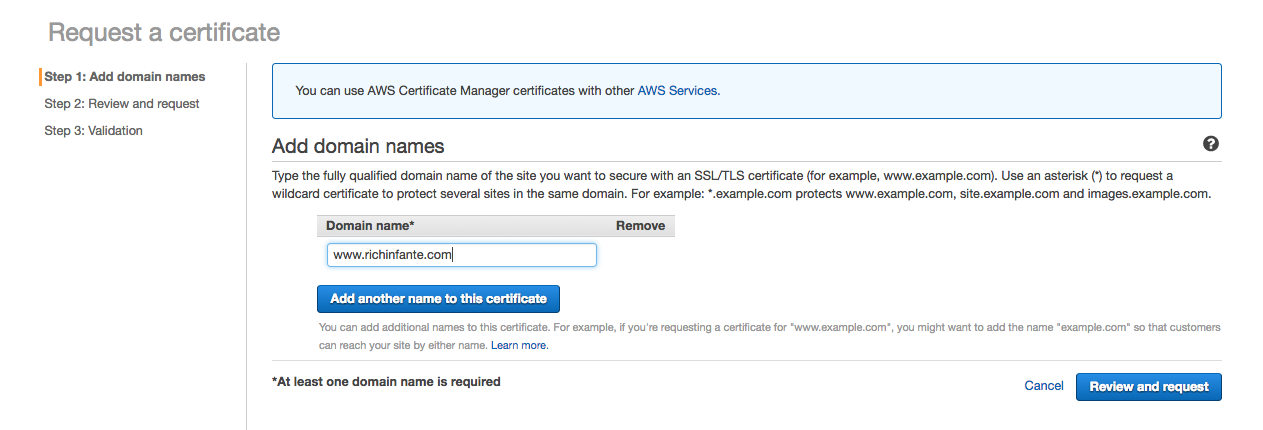
Next, we’re going to set up the domain name we’ll be using. First, we need to enter the domain name we’ll be using. You’re probably going to need to use the www subdomain.

Next, we’re going to provision ssl certificates for it. Before you do this, ensure your WHOIS info is up-to-date for your domain. You’ll notice there’s other options for enforcing SSL, which you can change.

Once you approve the certificate, you should be able to select it on the distribution page on the custom SSL certificate dropdown (you may need to press refresh to make it appear). Then, creating the distribution will take a little bit of time before it comes online. You should be then able to visit the page using the addess that amazon assigns to you. It will look like this: d3naao44xlwv9z.cloudfront.net
CNAME to your Cloudfront Distribution
Next, this step will vary based on your domain registrar. But essentially, you’ll be creating a CNAME record with your cloudfront distribution as the target. I’d advise you to do this on the www subdomain. While registrars will let you CNAME the root of your domain “the apex”, It will cause issues with all of the other things you may use it to host. Don’t do it. It’s a bad practice.
Profit 🚀
If all goes well, when you visit www.yourdomain.com, you should see your page, hosted by AWS. If your site isn’t encountering major traffic, you should be able to host it under the free tier for a little while!
If you liked this guide, you can follow me on twitter @richinfante. My DM’s are open if you find any problems with the tutorial or have any suggestions!